
Instalacja rTorrent + ruTorrent na ubuntu 20.04
Przedstawię dziś sposób instalacji uważanego za najlepszego linuksowego klienta torrent, mianowicie rTorrent z nakładką ruTorrent. Sam rTorrent jest klientem konsolowym i jego obsługa może być skomplikowana i niewygodna. Klient ma jednak duże możliwości i zużywa mało zasobów. Z pomocą przychodzi przeglądarkowa nakładka graficzna ruTorrent. RuTorrent jest bardzo rozbudowaną nakładką, której możliwości rozszerza się za pomocą pluginów. Obsługuje min. kanały RSS oraz IRC poprzez plugin autodl-irssi. RuTorrent do działania wymaga PHP i serwera www, np. Apache2 lub nginx.
Jako, że instalacja i konfiguracja rTorrent i ruTorren dla nowicjuszy może być dość skomplikowana powstało wiele skryptów instalacyjnych. Ich zaletąjest to, że instalujemy wszystko za pomocą jednego polecenia, wadą zaś, że tak naprawdę nie wiemy co robią i jeżeli instalacja się nie powiedzie, to często nie wiemy dlaczego.
Postanowiłem, że przedstawię dwa sposoby instalacji ruTorrenta, jeden za pomocą skryptu, który sam przetestowałem i uważam za najlepszy, roraz metodę manualną ze zrozumieniem następujących po sobie kroków.
Instalacja za pomocą skryptu
Wybrałem tutaj skrypt rt-auto-install, którego autorem jest Bercik1337. Przy okazji, podziękowania dla niego za napisanie tego skryptu, bo dzięki niemu zrozumiałem zasadę działania rtorrenta.
Skrypt dostępny jest pod adresem https://github.com/Bercik1337/rt-auto-install
Instalacja sprowadza się do wydania kilku poleceń z terminala:
git clone https://github.com/Bercik1337/rt-auto-install.git
cd rt-auto-install
sudo ./Rt-Install-minimal

lub

wget https://raw.githubusercontent.com/Bercik1337/rt-auto-install/master/Rt-Install-minimal
sudo ./Rt-Install-minimal
Skrypt sprawdzi czy nasz system jest kompatybilny i poprosi o podanie nazwy użytkownika systemowego. Potem należy podać nazwę użytkownika i hasło do interfejsu rutorrent. Na koniec wybieramy “0” i skrypt wykonuje instalację i konfigurację klienta rtorrent z nakładką rutorrent działającą na serwerze apache2.
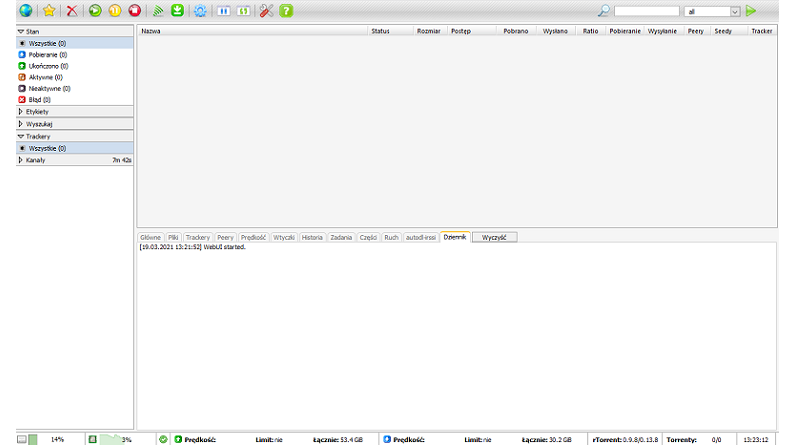
Po zakończonej instalacji ruTorrent będzie dostępny pod adresem http://ip-adres/rutorrent
Instalacja manualna
Instalację manualną zaczynamy od instalacji pakietów niezbędnych do działania rutorrent
sudo apt-get update
sudo apt-get install openssl git apache2-utils rar unrar zip unzip curl mc nano php php-curl php-cli libapache2-mod-php tmux mediainfo sox ffmpeg
Instalacja serwera apache
sudo apt-get install apache2
sudo systemctl enable apache2
Jeżeli ktoś woli inny serwer to można zainstalować nginx albo lighttpd
sudo apt-get install nginx
lub
sudo apt-get install lighttpd
Instalacja rtorrent
sudo apt-get install libxmlrpc-core-c3
sudo apt-get install libtorrent21
sudo apt-get install rtorrent
Instalacja modu SCGI apache2. Dla ubuntu 20.04 musimy zrobić to ręcznie, ponieważ paczka libapache2-mod-scgi została usunięta z repozytoriów.
wget http://mirrors.kernel.org/ubuntu/pool/universe/s/scgi/libapache2-mod-scgi_1.13-1.1build1_amd64.deb
sudo dpkg -i libapache2*.deb
Dla dystrybucji, które zawierają paczkę w repozytoriach instalujemy ją prostym poleceniem
sudo apt-get install libapache2-mod-scgi Tworzymy katalog sesji rtorrent
sudo mkdir /home/rtorrent-user/.rtorrent-session
sudo chown -R rtorrent-user:rtorrent-user /home/rtorrent-user/.rtorrent-session
Tworzymy katalog dla pobranych danych
sudo mkdir /home/rtorrent-user/Downloads
sudo chown -R rtorrent-user:rtorrent-user /home/rtorrent-user/Downloads
Jeżeli chcemy korzystać z funkcji automatycznego dodawania torrentów z katalogu, należy utworzyć folder watch
sudo mkdir /home/rtorrent-user/watch
sudo chown -R rtorrent-user:rtorrent-user /home/rtorrent-user/.rtorrent-session
Tworzymy plik konfiguracyjny rtorrent
nano /home/user/.rtorrent.rcI wklejamy zawartość
# This is an example resource file for rTorrent. Copy to
# ~/.rtorrent.rc and enable/modify the options as needed. Remember to
# uncomment the options you wish to enable.

# Maximum and minimum number of peers to connect to per torrent.
#min_peers = 40
#max_peers = 100

# Same as above but for seeding completed torrents (-1 = same as downloading)
#min_peers_seed = 10
#max_peers_seed = 50

# Maximum number of simultanious uploads per torrent.
#max_uploads = 15

# Global upload and download rate in KiB. "0" for unlimited.
#download_rate = 0
#upload_rate = 0

# Default directory to save the downloaded torrents.
directory = ~/Downloads

# Default session directory. Make sure you don't run multiple instance
# of rtorrent using the same session directory. Perhaps using a
# relative path?
session = ~/.rtorrent-session

# Watch a directory for new torrents, and stop those that have been
# deleted.
schedule = watch_directory, 5, 5, "load.start_verbose=~/watch/*.torrent"
#schedule = untied_directory,5,5,stop_untied=

# Close torrents when diskspace is low.
schedule = low_diskspace,5,60,close_low_diskspace=100M

# The ip address reported to the tracker.
#ip = 127.0.0.1
#ip = rakshasa.no

# The ip address the listening socket and outgoing connections is
# bound to.
#bind = 127.0.0.1
#bind = rakshasa.no

# Port range to use for listening.
port_range = 45000-45022

# Start opening ports at a random position within the port range.
port_random = no

# Check hash for finished torrents. Might be usefull until the bug is
# fixed that causes lack of diskspace not to be properly reported.
#check_hash = no

# Set whetever the client should try to connect to UDP trackers.
#use_udp_trackers = yes

# Alternative calls to bind and ip that should handle dynamic ip's.
#schedule = ip_tick,0,1800,ip=rakshasa
#schedule = bind_tick,0,1800,bind=rakshasa

# Encryption options, set to none (default) or any combination of the following:
# allow_incoming, try_outgoing, require, require_RC4, enable_retry, prefer_plaintext
#
# The example value allows incoming encrypted connections, starts unencrypted
# outgoing connections but retries with encryption if they fail, preferring
# plaintext to RC4 encryption after the encrypted handshake
#
encryption = allow_incoming,enable_retry,try_outgoing

# Enable DHT support for trackerless torrents or when all trackers are down.
# May be set to "disable" (completely disable DHT), "off" (do not start DHT),
# "auto" (start and stop DHT as needed), or "on" (start DHT immediately).
# The default is "off". For DHT to work, a session directory must be defined.
#
#dht.mode.set = on

# UDP port to use for DHT.
#
# dht_port = 6881

# Enable peer exchange (for torrents not marked private)
#
#protocol.pex.set = no
#trackers.use_udp.set = no

#
# Do not modify the following parameters unless you know what you're doing.
#

# Hash read-ahead controls how many MB to request the kernel to read
# ahead. If the value is too low the disk may not be fully utilized,
# while if too high the kernel might not be able to keep the read
# pages in memory thus end up trashing.
#hash_read_ahead = 10

# Interval between attempts to check the hash, in milliseconds.
#hash_interval = 100

# Number of attempts to check the hash while using the mincore status,
# before forcing. Overworked systems might need lower values to get a
# decent hash checking rate.
#hash_max_tries = 10

#SCGI
scgi_port = 127.0.0.1:5000

#XMLRPC
#network.scgi.open_port = 127.0.0.1:5000

####### Heavy I/O seedbox configuration
####### Uncomment lines below if you have 1Gbit+ Internet link
####### thanks Zebirek
####pieces.memory.max.set = 8048M
####network.max_open_sockets.set = 999
####network.max_open_files.set = 600
####network.http.max_open.set = 99
####network.receive_buffer.size.set = 32M
####network.send_buffer.size.set    = 64M
####pieces.preload.type.set = 2
#####pieces.preload.min_size.set = 262144
#####pieces.preload.min_rate.set = 5120
Za komunikację z rutorrentem odpowiada linia
#SCGI
#scgi_port = 127.0.0.1:5000
Jeżeli chcemy się łączyć przez XMLRPC należy skomentować lub usunąć powyższy wpis, a odkomentować lub dodać poniższy
#XMLRPC
network.scgi.open_port = 127.0.0.1:5000
Tworzymy usługę systemową aby rtorrent uruchamiał się wraz ze startem systemu
sudo nano /etc/systemd/system/rtorrent.serviceI wklejamy tekst poniżej
[Unit]
Description=rtorrent (in tmux)
[Service]
Type=forking
RemainAfterExit=yes
User=rtorrent-user
ExecStart=/usr/bin/tmux -2 new-session -d -s rtorrent rtorrent
ExecStop=/usr/bin/tmux send-keys -t rtorrent:rtorrent C-q
RemainAfterExit=no
Restart=on-failure
RestartSec=5s
[Install]
WantedBy=default.target
Usługę uruchamiamy poleceniem
sudo systemctl enable rtorrent.serviceInstalacja ruTorrent
Aby zainstalować rutorrent przechodzimy do katalogu /var/www i klonujemy katalog rutorrent za pomocą polecenia git.
cd /var/www
sudo git clone https://github.com/Novik/ruTorrent.git
sudo mv ruTorrent rutorrent
sudo chown -R www-data:www-data /var/www/rutorrent
sudo chmod -R 775 /var/www/rutorrent
Jeżeli otrzymamy komunikat, że użytkownik serwera www nie ma dostępu do jakiegoś programu należy ustawić ścieżki w pliku /var/www/rutorrent/conf/config.php jak poniżej
$pathToExternals = array(
                "python"=> '/usr/bin/python3',  // Something like /usr/bin/python. If empty, will be found in PATH.
                "php"   => '/usr/bin/php',      // Something like /usr/bin/php. If empty, will be found in PATH.
                "curl"  => '/usr/bin/curl',     // Something like /usr/bin/curl. If empty, will be found in PATH.
                "gzip"  => '/usr/bin/gzip',     // Something like /usr/bin/gzip. If empty, will be found in PATH.
                "id"    => '/usr/bin/id',       // Something like /usr/bin/id. If empty, will be found in PATH.
                "stat"  => '/usr/bin/stat',     // Something like /usr/bin/stat. If empty, will be found in PATH.
        );
Konfiguracja serwera
Włączamy mod SCGI do komunikacji rtorrenta z rutorrent (powinien być domyślnie włączony)
sudo a2enmod scgiWłączamy mod SCGI do komunikacji XMLRPC rtorrenta z rutorrent (powinien być domyślnie włączony)
sudo a2enmod proxy
sudo a2enmod proxy_scgi
Dodajemy ServerName localhost do pliku apache2.conf
sudo echo "ServerName localhost" /etc/apache2/apache2.conf;Tworzymy plik konfiguracyjny apache2 do obsługi rtorrent
sudo nano /etc/apache2/sites-available/001-rutorrent.confI uzupełniamy go
<VirtualHost *:80>
    DocumentRoot /var/www
    ErrorLog ${APACHE_LOG_DIR}/error.log
    CustomLog ${APACHE_LOG_DIR}/access.log combined
    CustomLog /var/log/apache2/rutorrent.log vhost_combined
    ErrorLog /var/log/apache2/rutorrent_error.log

    SCGIMount /RPC2 127.0.0.1:5000

    #XMLRPC
    #ProxyPass /RPC2 scgi://127.0.0.1:5000
</VirtualHost>
Jeżeli chcemy się łączyć przez XMLRPC należy skomentować lub usunąć wiersz
#SCGIMount /RPC2 127.0.0.1:5000A odkomentować lub dodać
ProxyPass /RPC2 scgi://127.0.0.1:5000Jeżeli zamierzamy łączyć się spoza sieci domowej należy dodać hasło do interfejsu rutorrent oraz do SCGI. Jeżeli łączymy się jedynie w sieci domowej, możemy nie dodawać hasła. Poniżej konfiguracja serwera apache2 zabezpieczonego hasłami.
<VirtualHost *:80>
    DocumentRoot /var/www
    ErrorLog ${APACHE_LOG_DIR}/error.log
    CustomLog ${APACHE_LOG_DIR}/access.log combined
    CustomLog /var/log/apache2/rutorrent.log vhost_combined
    ErrorLog /var/log/apache2/rutorrent_error.log

    SCGIMount /RPC2 127.0.0.1:5000

    #XMLRPC
    #ProxyPass /RPC2 scgi://127.0.0.1:5000

    <Directory "/var/www/rutorrent">
        AuthName "Tits or GTFO"
        AuthType Basic
        Require valid-user
        AuthUserFile /var/www/rutorrent/.htpasswd
    </Directory>
<location /RPC2>
AuthName "rTorrent secure access"
AuthType Basic
AuthBasicProvider file
AuthUserFile /home/rtorrent-user/Documents/rtorrent-htpasswd
Require user rtorrent-user
</location>
</VirtualHost>
Generujemy hasło do interfejscu ruTorrent
sudo htpasswd -c /var/www/rutorrent/.htpasswd rtorrent-user
Generujemy hasło do zabezpieczenia SCGI
sudo htpasswd -c /home/rtorrent-user/Documents/rtorrent-htpasswd rtorrent-userWyłączmy teraz domyślny plik konfiguracyjny apache2 i włączamy plik konfiguracyjny rutorrenta
sudo a2dissite 000-default.conf
sudo a2ensite 001-rutorrent.conf
Po wszystkim restartujemy apache2
sudo systemctl restart apache2Na tym instalacja została zakończona, ruTorrent będzie dostępny pod adresem http://ip-adres/rutorrent.
Najprawdopodobniej pokaże się błąd pluginu _cloudflare. Należy wtedy albo wyłączyć wtyczkę, albo doinstalować brakujące elementy, w następujący sposób
sudo apt-get install python3-pip
sudo pip3 install cloudscraper
Po tym zabiegu rutorrent nie powinien już zgłaszać żadnych błedów.
Aktualizacja 28.2023 – konfiguracja serwera NGINX
Ponieważ niedawno zmieniłem serwer z Apache na nginx, podzielę się moją konfiguracją nginx:
server {
  listen 80 default_server;
  listen [::]:80 default_server;

        root /var/www;
        index index.php index.html index.htm;

        # Allow larger .torrent files to upload.
        # If experiencing a "413 Request Entity Too Large" error,
        # feel free to increase this setting.
        client_max_body_size 4M;

        location /rutorrent {
                # First attempt to serve request as file, then
                # as directory, then fall back to displaying a 404.
                try_files $uri $uri/ =404;
                # Uncomment to enable naxsi on this location
                # include /etc/nginx/naxsi.rules
                auth_basic "Tits or GTFO";
                auth_basic_user_file /var/www/rutorrent/.htpasswd;
        }

        location ~ \.php$ {
                fastcgi_split_path_info ^(.+\.php)(/.+)$;
                fastcgi_pass unix:/run/php/php8.2-fpm.sock;
                fastcgi_param SCRIPT_FILENAME $request_filename;
                include fastcgi_params;
                fastcgi_index index.php;
        }

        location /rutorrent/RPC2 {
                include scgi_params;
                scgi_pass 127.0.0.1:5000;
                scgi_param SCRIPT_NAME /RPC2;
        }
}