
Install rTorrent + ruTorrent on ubuntu 20.04
Today I will present how to install what is considered to be the best Linux torrent client, namely rTorrent with ruTorrent overlay. RTorrent itself is a console client and its operation can be complicated and inconvenient. However, the customer has great possibilities and uses little resources. The ruTorrent browser graphic interface comes to the rescue. RuTorrent is a very extensive add-on, the possibilities of which are extended by plugins. Supports min. RSS and IRC feeds via the autodl-irssi plugin. RuTorrent requires PHP and a web server to run, eg Apache2 or nginx.
As the installation and configuration of rTorrent and ruTorren for novices can be quite complicated, many installation scripts have been created. Their advantage is that we install everything with one command, the disadvantage is that we don’t really know what they are doing, and if the installation fails, we often don’t know why.
I decided to present two ways to install ruTorrent, one using a script that I tested myself and considered the best, and a manual method with understanding the steps that followed.
Instalallation with script
I chose here the rt-auto-install script by Bercik1337. By the way, thanks to him for writing this script, because it made me understand how rtorrent works.
The script is available at https://github.com/Bercik1337/rt-auto-install
Installation is as simple as issuing a few commands from the terminal:
git clone https://github.com/Bercik1337/rt-auto-install.git
cd rt-auto-install
sudo ./Rt-Install-minimal

or

wget https://raw.githubusercontent.com/Bercik1337/rt-auto-install/master/Rt-Install-minimal
sudo ./Rt-Install-minimal
The script will check if our system is compatible and ask for the system username. Then enter the username and password for the rutorrent interface. Finally we select “0” and the script performs the installation and configuration of the rtorrent client with the rutorrent frontend running on the apache2 server.
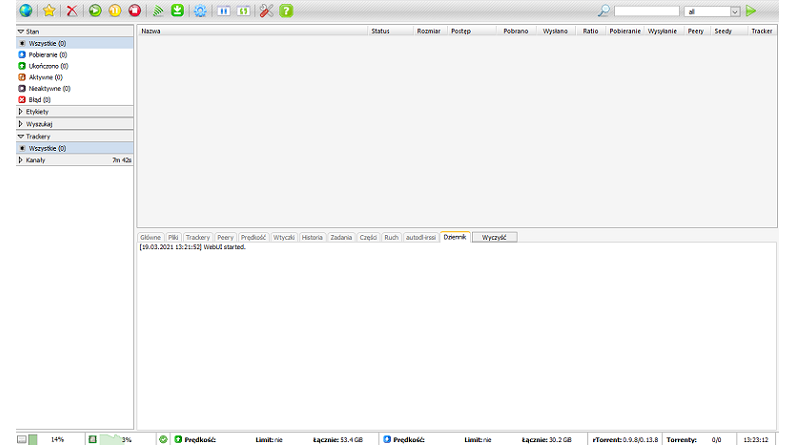
After the installation is complete, ruTorrent will be available at http://ip-adress/rutorrent
Manual installation
We start the manual installation by installing the packages necessary for rutorrent to work
sudo apt-get update
sudo apt-get install openssl git apache2-utils rar unrar zip unzip curl mc nano php php-curl php-cli libapache2-mod-php tmux mediainfo sox ffmpeg
Apache2 installation
sudo apt-get install apache2
sudo systemctl enable apache2
If you prefer a different server, you can install nginx or lighttpd
sudo apt-get install nginx
lub
sudo apt-get install lighttpd
Rtorrent installation
sudo apt-get install libxmlrpc-core-c3
sudo apt-get install libtorrent21
sudo apt-get install rtorrent
Installing the apache2 SCGI mod. For ubuntu 20.04 we have to do it manually as libapache2-mod-scgi has been removed from the repositories.
wget http://mirrors.kernel.org/ubuntu/pool/universe/s/scgi/libapache2-mod-scgi_1.13-1.1build1_amd64.deb
sudo dpkg -i libapache2*.deb
For distributions that include the package in their repositories, install it with a simple command
sudo apt-get install libapache2-mod-scgi We create a rtorrent session directory
sudo mkdir /home/rtorrent-user/.rtorrent-session
sudo chown -R rtorrent-user:rtorrent-user /home/rtorrent-user/.rtorrent-session
We create a directory for the downloaded data
sudo mkdir /home/rtorrent-user/Downloads
sudo chown -R rtorrent-user:rtorrent-user /home/rtorrent-user/Downloads
If you want to use the function of automatically adding torrents from the directory, you should create a watch folder
sudo mkdir /home/rtorrent-user/watch
sudo chown -R rtorrent-user:rtorrent-user /home/rtorrent-user/.rtorrent-session
We create the rtorrent configuration file
nano /home/user/.rtorrent.rcAnd we paste the content
# This is an example resource file for rTorrent. Copy to
# ~/.rtorrent.rc and enable/modify the options as needed. Remember to
# uncomment the options you wish to enable.

# Maximum and minimum number of peers to connect to per torrent.
#min_peers = 40
#max_peers = 100

# Same as above but for seeding completed torrents (-1 = same as downloading)
#min_peers_seed = 10
#max_peers_seed = 50

# Maximum number of simultanious uploads per torrent.
#max_uploads = 15

# Global upload and download rate in KiB. "0" for unlimited.
#download_rate = 0
#upload_rate = 0

# Default directory to save the downloaded torrents.
directory = ~/Downloads

# Default session directory. Make sure you don't run multiple instance
# of rtorrent using the same session directory. Perhaps using a
# relative path?
session = ~/.rtorrent-session

# Watch a directory for new torrents, and stop those that have been
# deleted.
schedule = watch_directory, 5, 5, "load.start_verbose=~/watch/*.torrent"
#schedule = untied_directory,5,5,stop_untied=

# Close torrents when diskspace is low.
schedule = low_diskspace,5,60,close_low_diskspace=100M

# The ip address reported to the tracker.
#ip = 127.0.0.1
#ip = rakshasa.no

# The ip address the listening socket and outgoing connections is
# bound to.
#bind = 127.0.0.1
#bind = rakshasa.no

# Port range to use for listening.
port_range = 45000-45022

# Start opening ports at a random position within the port range.
port_random = no

# Check hash for finished torrents. Might be usefull until the bug is
# fixed that causes lack of diskspace not to be properly reported.
#check_hash = no

# Set whetever the client should try to connect to UDP trackers.
#use_udp_trackers = yes

# Alternative calls to bind and ip that should handle dynamic ip's.
#schedule = ip_tick,0,1800,ip=rakshasa
#schedule = bind_tick,0,1800,bind=rakshasa

# Encryption options, set to none (default) or any combination of the following:
# allow_incoming, try_outgoing, require, require_RC4, enable_retry, prefer_plaintext
#
# The example value allows incoming encrypted connections, starts unencrypted
# outgoing connections but retries with encryption if they fail, preferring
# plaintext to RC4 encryption after the encrypted handshake
#
encryption = allow_incoming,enable_retry,try_outgoing

# Enable DHT support for trackerless torrents or when all trackers are down.
# May be set to "disable" (completely disable DHT), "off" (do not start DHT),
# "auto" (start and stop DHT as needed), or "on" (start DHT immediately).
# The default is "off". For DHT to work, a session directory must be defined.
#
#dht.mode.set = on

# UDP port to use for DHT.
#
# dht_port = 6881

# Enable peer exchange (for torrents not marked private)
#
#protocol.pex.set = no
#trackers.use_udp.set = no

#
# Do not modify the following parameters unless you know what you're doing.
#

# Hash read-ahead controls how many MB to request the kernel to read
# ahead. If the value is too low the disk may not be fully utilized,
# while if too high the kernel might not be able to keep the read
# pages in memory thus end up trashing.
#hash_read_ahead = 10

# Interval between attempts to check the hash, in milliseconds.
#hash_interval = 100

# Number of attempts to check the hash while using the mincore status,
# before forcing. Overworked systems might need lower values to get a
# decent hash checking rate.
#hash_max_tries = 10

#SCGI
scgi_port = 127.0.0.1:5000

#XMLRPC
#network.scgi.open_port = 127.0.0.1:5000

####### Heavy I/O seedbox configuration
####### Uncomment lines below if you have 1Gbit+ Internet link
####### thanks Zebirek
####pieces.memory.max.set = 8048M
####network.max_open_sockets.set = 999
####network.max_open_files.set = 600
####network.http.max_open.set = 99
####network.receive_buffer.size.set = 32M
####network.send_buffer.size.set    = 64M
####pieces.preload.type.set = 2
#####pieces.preload.min_size.set = 262144
#####pieces.preload.min_rate.set = 5120
The line is responsible for communication with the rutorrent
#SCGI
#scgi_port = 127.0.0.1:5000
If we want to connect via XMLRPC, please comment or delete the above entry, and uncomment or add the following
#XMLRPC
network.scgi.open_port = 127.0.0.1:5000
We create a system service to make rtorrent run when the system starts
sudo nano /etc/systemd/system/rtorrent.serviceAnd we paste the text below
[Unit]
Description=rtorrent (in tmux)
[Service]
Type=forking
RemainAfterExit=yes
User=rtorrent-user
ExecStart=/usr/bin/tmux -2 new-session -d -s rtorrent rtorrent
ExecStop=/usr/bin/tmux send-keys -t rtorrent:rtorrent C-q
RemainAfterExit=no
Restart=on-failure
RestartSec=5s
[Install]
WantedBy=default.target
We start the service with the command
sudo systemctl enable rtorrent.serviceRuTorrent installation
To install rutorrent go to the /var/www directory and clone the rutorrent directory with the git command.
cd /var/www
sudo git clone https://github.com/Novik/ruTorrent.git
sudo mv ruTorrent rutorrent
sudo chown -R www-data:www-data /var/www/rutorrent
sudo chmod -R 775 /var/www/rutorrent
If we receive a message that the user of the web server does not have access to some program, set the paths in the /var/www/rutorrent/conf/config.php file as below
$pathToExternals = array(
                "python"=> '/usr/bin/python3',  // Something like /usr/bin/python. If empty, will be found in PATH.
                "php"   => '/usr/bin/php',      // Something like /usr/bin/php. If empty, will be found in PATH.
                "curl"  => '/usr/bin/curl',     // Something like /usr/bin/curl. If empty, will be found in PATH.
                "gzip"  => '/usr/bin/gzip',     // Something like /usr/bin/gzip. If empty, will be found in PATH.
                "id"    => '/usr/bin/id',       // Something like /usr/bin/id. If empty, will be found in PATH.
                "stat"  => '/usr/bin/stat',     // Something like /usr/bin/stat. If empty, will be found in PATH.
        );
Apache2 configuration
We enable the SCGI mod for rtorrent communication with rutorrent (should be enabled by default)
sudo a2enmod scgiWe enable the SCGI mod for XMLRPC rtorrent communication with rutorrent (should be enabled by default)
sudo a2enmod proxy
sudo a2enmod proxy_scgi
We add ServerName localhost to the apache2.conf file
sudo echo "ServerName localhost" /etc/apache2/apache2.conf;We create apache2 configuration file to handle rtorrent
sudo nano /etc/apache2/sites-available/001-rutorrent.confAnd we complete it
<VirtualHost *:80>
    DocumentRoot /var/www
    ErrorLog ${APACHE_LOG_DIR}/error.log
    CustomLog ${APACHE_LOG_DIR}/access.log combined
    CustomLog /var/log/apache2/rutorrent.log vhost_combined
    ErrorLog /var/log/apache2/rutorrent_error.log

    SCGIMount /RPC2 127.0.0.1:5000

    #XMLRPC
    #ProxyPass /RPC2 scgi://127.0.0.1:5000
</VirtualHost>
If we want to connect via XMLRPC, comment or delete the line
#SCGIMount /RPC2 127.0.0.1:5000And to uncomment or add
ProxyPass /RPC2 scgi://127.0.0.1:5000If you intend to connect from outside the home network, add a password to the rutorrent interface and to the SCGI. If we connect only to the home network, we may not add the password. Below is the configuration of the password-protected apache2 server.
<VirtualHost *:80>
    DocumentRoot /var/www
    ErrorLog ${APACHE_LOG_DIR}/error.log
    CustomLog ${APACHE_LOG_DIR}/access.log combined
    CustomLog /var/log/apache2/rutorrent.log vhost_combined
    ErrorLog /var/log/apache2/rutorrent_error.log

    SCGIMount /RPC2 127.0.0.1:5000

    #XMLRPC
    #ProxyPass /RPC2 scgi://127.0.0.1:5000

    <Directory "/var/www/rutorrent">
        AuthName "Tits or GTFO"
        AuthType Basic
        Require valid-user
        AuthUserFile /var/www/rutorrent/.htpasswd
    </Directory>
<location /RPC2>
AuthName "rTorrent secure access"
AuthType Basic
AuthBasicProvider file
AuthUserFile /home/rtorrent-user/Documents/rtorrent-htpasswd
Require user rtorrent-user
</location>
</VirtualHost>
We generate the password for ruTorrent webui
sudo htpasswd -c /var/www/rutorrent/.htpasswd rtorrent-user
We generate the password for SCGI
sudo htpasswd -c /home/rtorrent-user/Documents/rtorrent-htpasswd rtorrent-userNow let’s disable the default apache2 configuration file and enable the rutorrent configuration file
sudo a2dissite 000-default.conf
sudo a2ensite 001-rutorrent.conf
After all, restart apache2
sudo systemctl restart apache2On this the installation has been completed, ruTorrent will be available at http://ip-adress/rutorrent.
Most likely you will get a _cloudflare plugin error. You should then either disable the plug or install the missing components as follows
sudo apt-get install python3-pip
sudo pip3 install cloudscraper
After this treatment, rutorrent should no longer report any errors.
UPDATE 28.2023 – NGINX configuration
As I recently changed the server from apache to nginx, I will share my nginx configuration:
server {
  listen 80 default_server;
  listen [::]:80 default_server;

        root /var/www;
        index index.php index.html index.htm;

        # Allow larger .torrent files to upload.
        # If experiencing a "413 Request Entity Too Large" error,
        # feel free to increase this setting.
        client_max_body_size 4M;

        location /rutorrent {
                # First attempt to serve request as file, then
                # as directory, then fall back to displaying a 404.
                try_files $uri $uri/ =404;
                # Uncomment to enable naxsi on this location
                # include /etc/nginx/naxsi.rules
                auth_basic "Tits or GTFO";
                auth_basic_user_file /var/www/rutorrent/.htpasswd;
        }

        location ~ \.php$ {
                fastcgi_split_path_info ^(.+\.php)(/.+)$;
                fastcgi_pass unix:/run/php/php8.2-fpm.sock;
                fastcgi_param SCRIPT_FILENAME $request_filename;
                include fastcgi_params;
                fastcgi_index index.php;
        }

        location /rutorrent/RPC2 {
                include scgi_params;
                scgi_pass 127.0.0.1:5000;
                scgi_param SCRIPT_NAME /RPC2;
        }
}
Could you show the virtual host configuration for Nginx? Thank you.
I added nginx configuration.
Only now because I haven’t used the nginx server before.